ILLUSTRATIONS BY ABIGAIL LANOUE
There is something so satisfying about growing plants from seed: It is economical, productive, and inspiring. Watching a vegetable garden take shape from a dozen or so packets of seeds is always a marvel as it is somewhat miraculous to see the bounty that can come from a handful of seeds. And for those who like to grow lesser-known varieties of vegetables, it is an opportunity to cultivate varieties of tomatoes, squashes, peppers, peas, and lettuces not necessarily available as plants at the local garden center.
For centuries, farmers and home gardeners did not buy seeds each year to plant anew in their garden; they saved them from season to season, and reintroduced them into their garden each year, and also shared them with others. The art of seed saving evolved over time, with gardeners learning how to preserve the qualities they revered for flavor, color, hardiness, or disease resistance. And they did this well before we had an understanding of genetics and inheritance. Gardeners today still save seeds, and the process is relatively straightforward once one understands a little bit about plants and how they produce their seeds.
Old seed varieties, often known as heirloom or open-pollinated varieties, produce reliable crops of true-to-type produce if managed properly. True-to-type means that the seeds of these varieties, when pollinated by the flower of the same variety and properly collected, will produce plants that are nearly identical to their parent plant. In other words, a Brandywine tomato’s seeds would create a tomato that looked like its parent, with its deep-red skin, curvaceous form, and signature taste. Hybrid seeds, introduced in the 20th century, produce seeds that will most likely not resemble the parent plant due to their genetics. For example, if one planted a seed collected from a Big Boy hybrid tomato and planted it, the resulting plant would produce fruit that most likely would not resemble its parent at all, and may even produce a tomato that one would consider inedible. For this reason, seed savers collect seeds only from heirloom or open-pollinated varieties.
While there is a lot to understand about how a plant produces flowers and sexually reproduces by producing fruits that contain seeds, the best news for beginning seed savers is that plants produce seeds naturally and we are simply stewarding the pollination and collection of their seeds when they ripen. Simply put: Seeds germinate, plants grow, flowers are formed, flowers get pollinated and produce fruit, the seeds inside the fruit mature, and we simply collect them. This is true for tomatoes (we eat their fruit), peas (we eat their seeds), and lettuce (we eat their leaves before the plants even flower and set seed). Seed saving essentially involves knowing when these plants have ripened their seeds and collecting them at that time.
COLLECTING PEA, BEAN, AND LETTUCE SEEDS
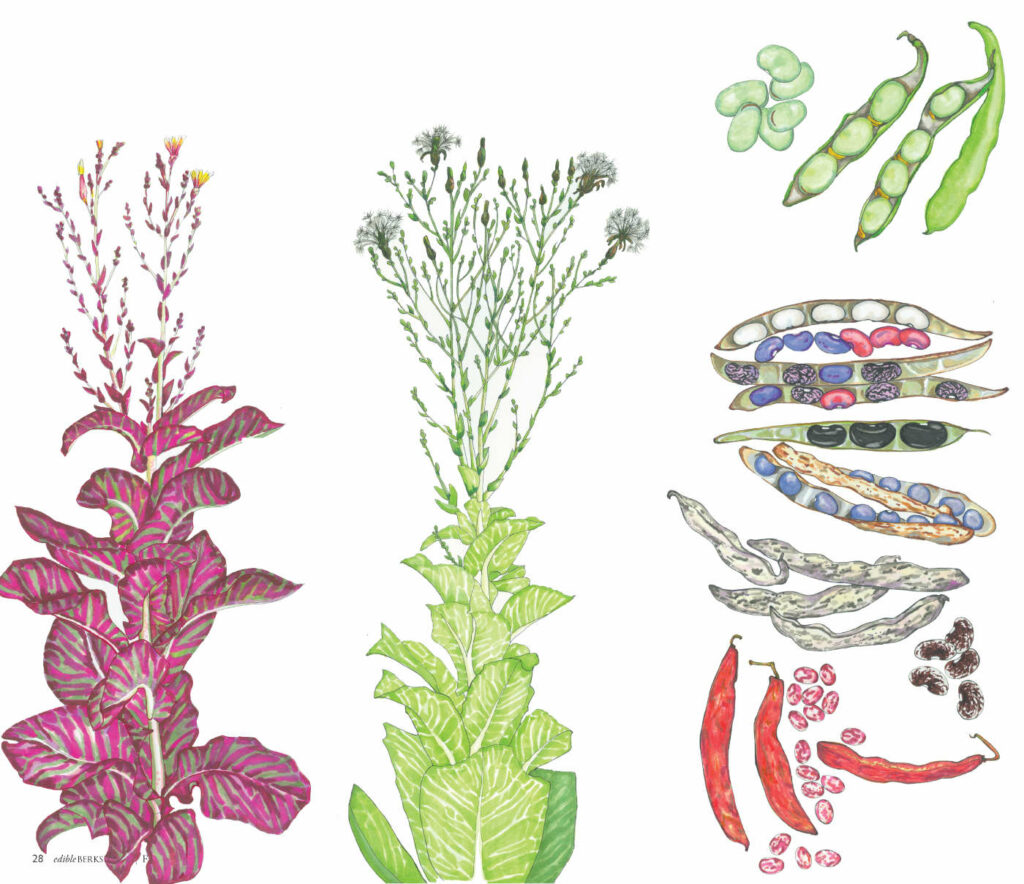
Some of the easiest crops to collect seeds from are beans, peas, and lettuce. When saving seeds, one of the things that a gardener needs to know is that the pollen of a flower of the same variety pollinated the flower that will eventually form the fruit and seeds to be collected. These three crops have flowers that self-pollinate; the male parts of these flowers work within the same flower to pollinate the female part, ensuring that the seeds were pollinated by their own variety. Additionally, lettuces, beans, and peas are typically all heirloom or open-pollinated varieties, so their seeds will come true-to-type. Collecting the seeds of peas and beans is as simple as allowing the seed pods to develop and for the seeds inside to become hard (the pod will be brown and dry and ready to split open at this point) and harvesting them. The pods are then broken open, and the dry bean and pea seeds are removed and stored to be grown the next season. Soup peas and dried beans for cooking are shelled in this manner, too, however, fresh green beans and green peas are eaten before the seeds have had time to fully mature and harden. Peas and beans make a great seed-saving project to do with children, as collecting the dried pods, shelling the easy-to-handle seeds, and packing them is a fun project.
Lettuce is also easy to collect seed from, but when we want seed, it is essential to let the plant grow beyond the moment at which we would typically harvest it. We often refer to this moment as “bolting” or “setting seed,” and we will usually remove the lettuce from the garden when it sends up its flower spike, since bolted lettuce can be bitter and unpalatable. However, seed savers will want to grow plants until they set flower and then produce seed. Knowing when the seed is ready to collect is easy. The seeds, which will sit atop the plants where the flowers once were, will develop feathery white pappi, like those on a dandelion when it has seeds. Pappi form to carry the seed off on the wind so that the seeds will land away from the mother plant and germinate, but they are also helpful in collecting seed for saving, as they indicate that the seed is ripe and ready for harvesting. One can simply collect the seeds with their pappi into a paper or mesh bag. The seeds are then left in a cool, dry place for a few weeks, then removed from the bag, and gently rubbed together to break the seeds apart from the rest of the collected plant matter. Next, they are winnowed. Winnowing is the act of separating the seed from the chaff (the non-seed organic matter that is collected with the seed). A simple method is to set the seed in a shallow bowl and to gently blow across the bowl, heavily enough to carry away the chaff but not heavily enough to blow away the seed, which is heavier and will remain behind in the bowl. Once this task is completed, the seeds can simply be placed in manila coin envelopes and stored (always label seeds with the variety name and date harvested so they can be identified later).
COLLECTING TOMATO AND WATERMELON SEEDS
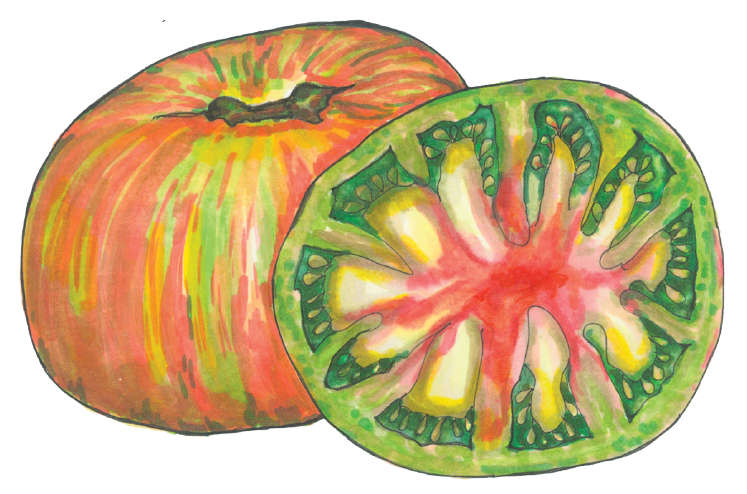
The seeds above are all known as dry-fruited seeds, but some plants such as tomatoes, cucumbers, and watermelon hold their seeds in wet fruits (in both cases the fruit that we eat). Tomato seeds are a bit more complicated to save, but given our love of certain varieties of tomatoes, well worth the effort to preserve. Because tomatoes can be self-pollinating or cross-pollinated, a seed saver needs to do something to manage the pollination of the fruits from which seeds will be saved. If one is only growing one type of tomato, this is not a concern, but as gardeners often grow a number of varieties of tomatoes, one may need to do something else to manage the pollination. One approach is to isolate varieties by planting the varieties 10 to 20 feet apart. This should ensure that the tomatoes collected are pollinated by the same variety. Another option is to place a small mesh bag over a tomato flower until it starts to fruit, and then removing the bag and marking the fruit for collection for seed saving. This prevents cross-pollination by insects and forces the flower to self-fertilize, ensuring a true-to-type fruit from which seeds can be saved.
Once this is done, tomatoes have an additional step called “fermentation.” The seeds of the fruit should be squeezed from the tomato with some of the gelatinous fluid that surrounds them and set into a pint canning jar that is filled halfway with water. The seeds are then set in a warm spot out of direct light (the top of a fridge or a warm porch are good options) until a white mold forms on the seed (about three to five days). The seeds are then rinsed clean in a colander and set onto coffee filters to dry thoroughly before being stored for use later. (Coffee filters do not stick to the seeds and the variety of the seed can be written on the filter to help keep things in order when saving multiple varieties.) This process is essential as tomatoes have a natural germination inhibitor that is removed by this process, which will slow or limit the seed’s ability to germinate if not removed.
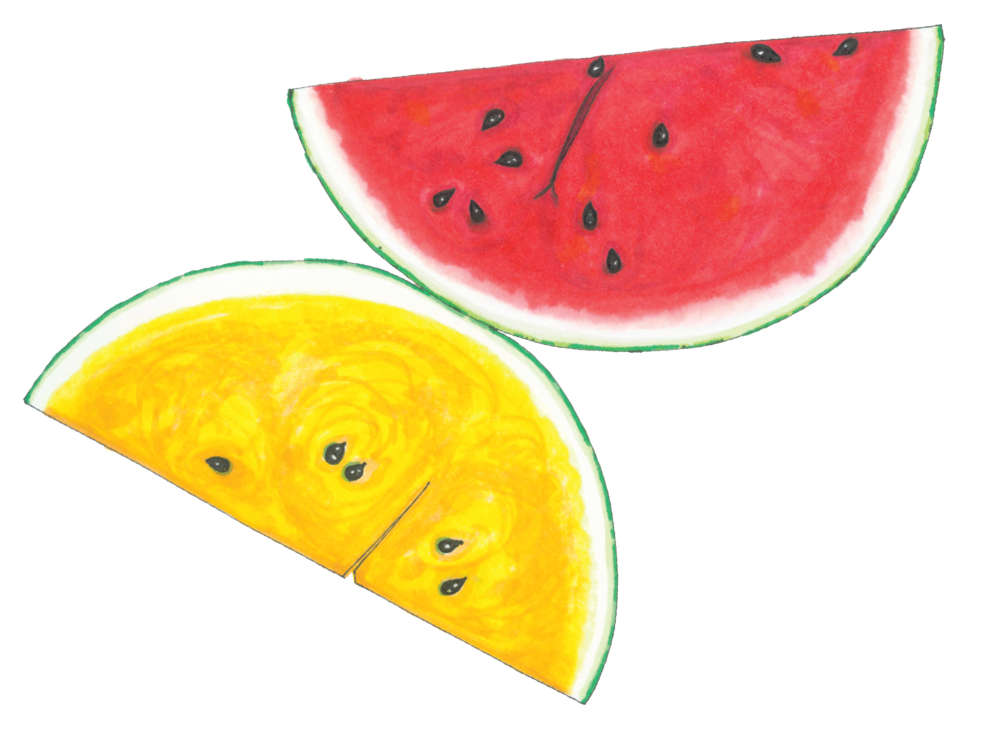
The process for tomatoes may seem complex but it is worth the effort. However, if this seems like a lot, maybe consider saving watermelon seeds instead. Provided the watermelon is an heirloom variety and has not been cross-pollinated by another variety (most gardeners typically only grow one variety of watermelon so this is not a concern), the seeds are ready for harvesting at the same time as we are eating the watermelon. The seeds can simply be spit out (or removed before eating the watermelon for more genteel folks), rinsed off in a colander, set on coffee filters or paper plates to dry, and then simply stored once the seeds are hard and dry (usually several weeks later). For a novice seed saver, the act of eating watermelon while simultaneously saving its seeds for next year, may be a good place to begin. You can simply eat the fruit, reserve its seeds for drying, and have seeds on hand for next season in no time.
STORING SEEDS
Many seeds are viable for a number of years, so collecting seeds of a favorite tomato variety can provide tomato plants for seasons to come (or for sharing). This is good news because a single tomato can provide up to 300 seeds. There are a couple of tricks to storing seeds well. First, ensure that they are properly dried before placing in a manila coin envelop. (Don’t forget to label them at this time because you may not remember what you saved in the seasons ahead). And most importantly, store the seeds in a cool, dry spot away from direct sunlight. This will ensure that the seeds are viable for as long as possible. Properly stored, tomato seeds can still germinate after 10 years. Their shelf life is expanded by being kept dry and cool, but for non-commercial seed it is best not to store them in a refrigerator or freezer. Such temperatures could cause the water in the seed to freeze and damage the seeds if they were not sufficiently dried before being stored. The same advice holds true for purchased seed as well—keeping it cool and dry allows you to save the leftover seed for the next season. And with any luck, one can find time to save the seeds of a beloved heirloom variety before the packet runs out.